Xhibiter comes with Adobe Fonts integration. First, make sure that Xhibiter Core plugin is installed and activated. Go to Adobe Fonts and login with your Adobe ID account.
Project ID can be found under the Web Projects tab.
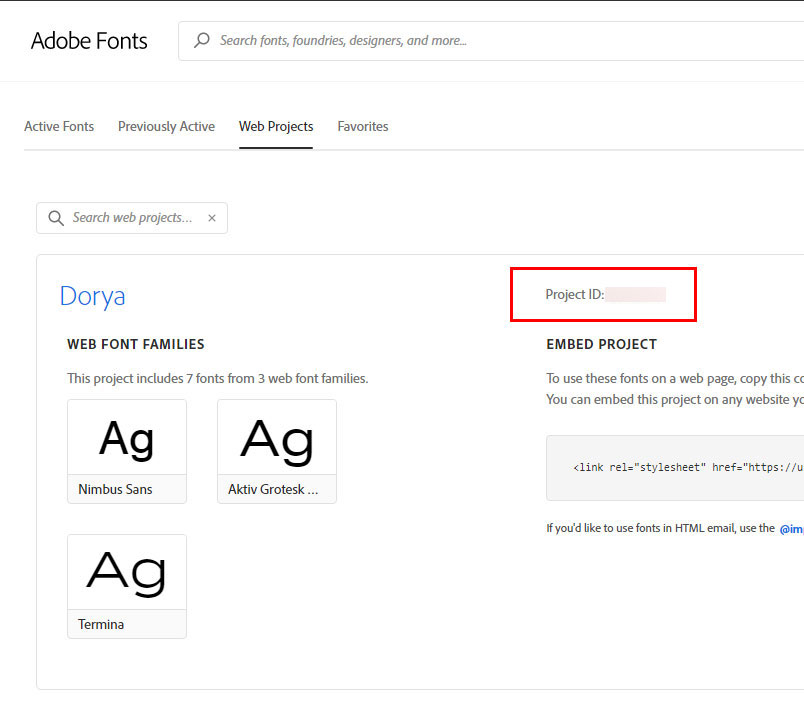
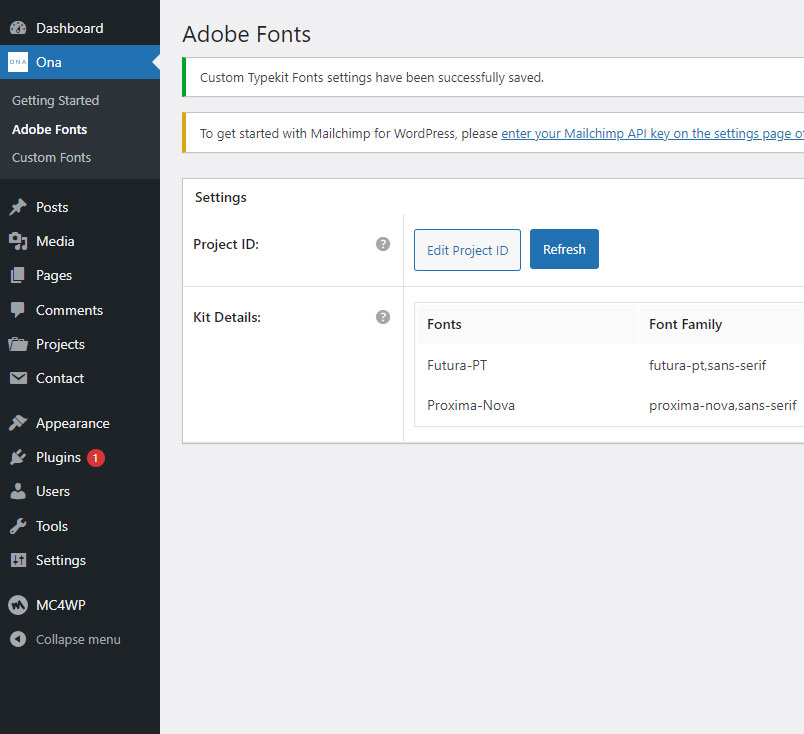
Copy your Project ID, navigate to Xhibiter -> Adobe Fonts, and paste your Adobe Project ID. After this, you will see a list of fonts from your Adobe Fonts web project.
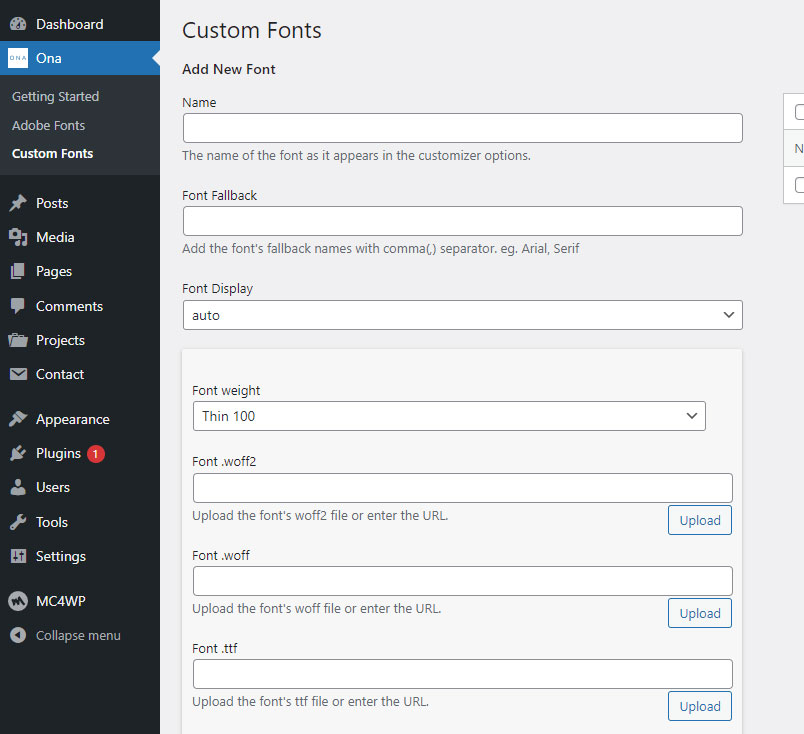
Custom Fonts
Navigate to Xhibiter -> Custom Fonts and upload your custom fonts, giving them a name and optional font fallback. Once done, click the button Add new font. Navigate to Appearance -> Customize -> Typography to see and select the fonts from the list.