Getting Started
Unzip files from archive and you will find following folders and files.
- includes/demo-import – folder with data import files
- estand-child.zip – archive with child theme
- estand-theme.zip – archive with installable WordPress theme
- Elementor Templates – folder with Elementor template files
Theme Installation and Demo Import Video Tutorial
Plugins Installation
After theme installation you’ll see a notification with recommended plugins that you should install if you want to get full functionality of a theme. The most important plugins are highlighted with Required label.
Plugins Included with the theme
- Deo Core – Our main plugin, contains important theme functions, such as social media, custom post types, WordPress widgets etc.
- Deo Elementor – Extension for Elementor page builder. Includes custom widgets for Elementor.
- Meta Box – The main plugin responsible for custom metaboxes. ( required – free )
- Kirki Toolkit – A framework used for adding theme options to the WordPress Customizer. ( required – free )
- Elementor – The most advanced Drag and Drop front-end page builder
- Envato Market – Plugin responsible for theme updates
- Mailchimp for WordPress – Plugin for Mailchimp integration
- Contact Form 7 – Just another contact form plugin. Simple but flexible.
- Smash Balloon Instagram Feed – Display beautifully clean, customizable, and responsive Instagram feeds.
- One Click Demo Import – Plugin responsible for demo and theme settings import
- Cost Calculator – This plugin can be purchased on CodeCanyon if needed.
Note: There is no need to keep active plugins that you’re not going to use. One Click Demo Import can be deactivated once importing demo content is finished.
Demo import
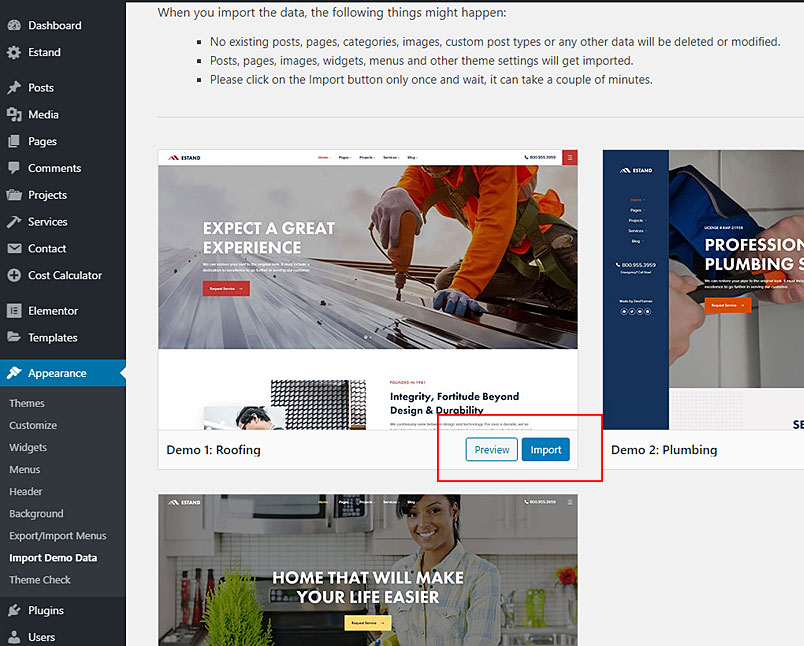
The process of importing demo content is quite straightforward. Simply follow these steps:
- Install all the required plugins for the theme. Download and install Cost Calculator plugin if needed.
- Navigate to Appearance -> Import Demo Data choose the demo and click Import
- Wait until the process is completed
